Save money by making these DIY Chobani Flips. This favorite kid snack has gluten-free and dairy-free options. Meal prep these yogurts ahead of time and have healthy after school snacks, healthy breakfasts and kids lunch ideas.
Have you heard of Chobani Flips? They are “Crafted Combinations of Greek Yogurt & Only Natural Mix-Ins”. And my kids LOVE them. But here’s the thing – they are somewhat expensive – like $1.50 each. And truth be told, if my kids could eat two a day, they would!
This post is actually thanks to my 14 year-old who told me we should make our own. While the original ingredients aren’t horrible, I knew we could make them better by making our own mix-ins. In fact, there were a number of changes we wanted to make. Here’s a list:
Why make your own DIY Chobani Flips when you can buy them pre-made?
- I personally choose to use organic dairy overall, and this way I can by a large container of organic yogurt OR make it in my Instant Pot. This cuts down on cost and ensures ingredients are organic.
- One of my daughters is dairy-free, so we make dairy-free DIY Chobani Flips with coconut, almond or oat milk yogurt.
- There is only one version of the “real” Chobani Flips that is gluten-free, but by making your own, all of them can be gluten-free!
- Many of the ingredients are pretty processed/high in sugar. When you make your own, you can control this.
- You can adjust quantities of toppings and yogurt to fit your appetite.
- Buy your toppings in bulk and save money this way, too.
How healthy are Chobani Flips?
There are 5.5 teaspoons of sugar in these popular yogurts. Though one teaspoon is naturally occurring, that’s still a lot of added sugar! Their entire product line is GMO free, so that’s a plus. And they do have live cultures within which is a good thing, too. To make them healthier, simply make your own where you can control the yogurt going in as well as the toppings.
Products needed to make DIY Chobani Flips
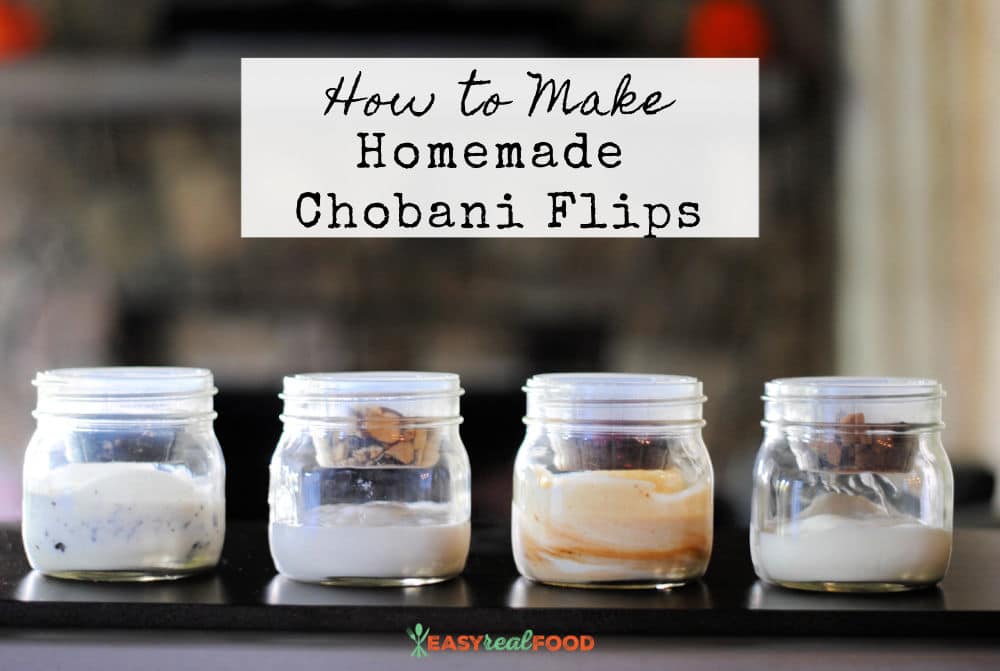
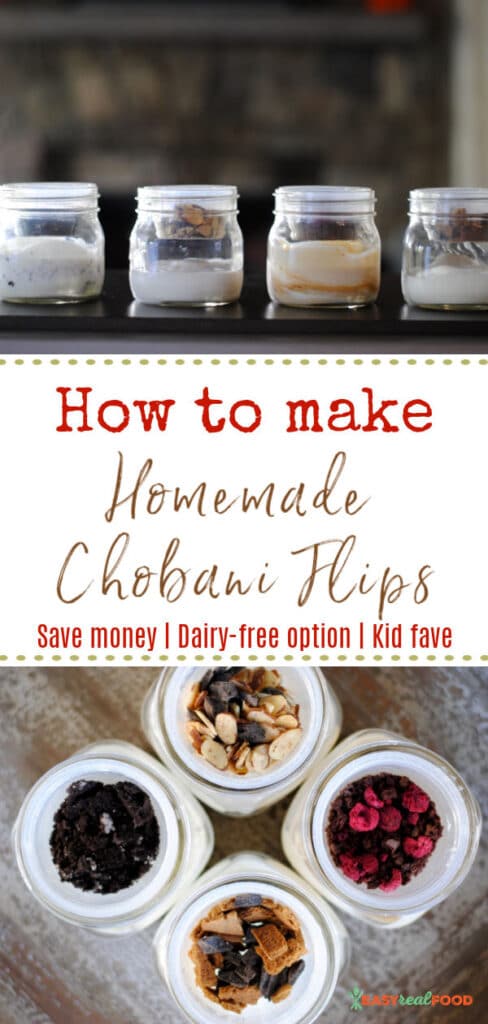
This was actually a fun project to find the best products to make these popular yogurts in advance. We found that eating and cleaning out applesauce cups for the toppings and putting the yogurt in these canning jars. Put the lid on, and you are ready to go!
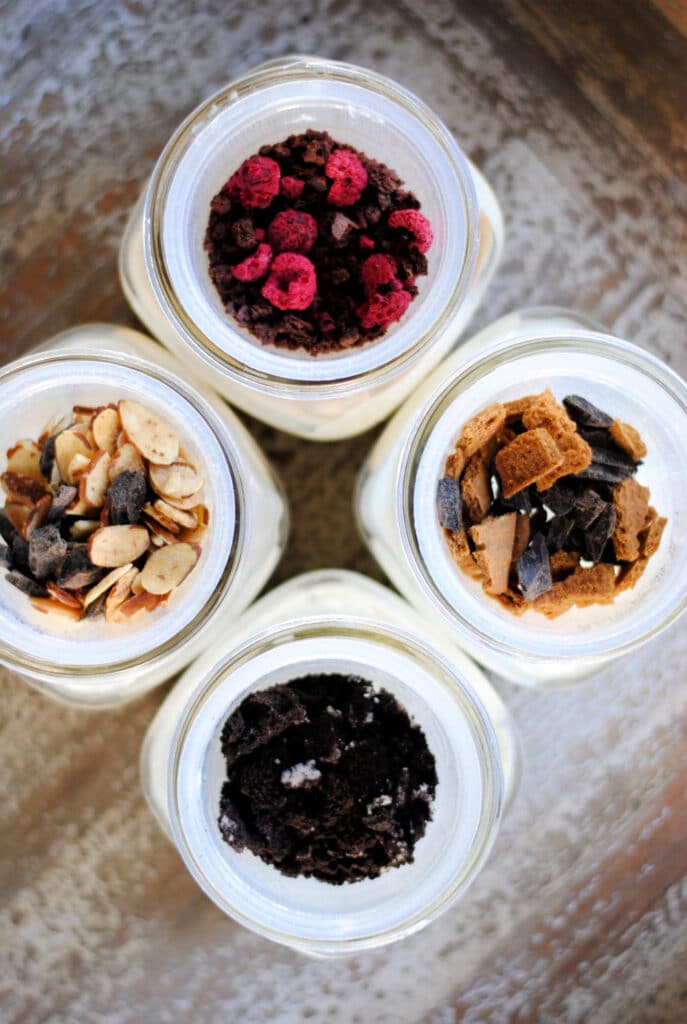
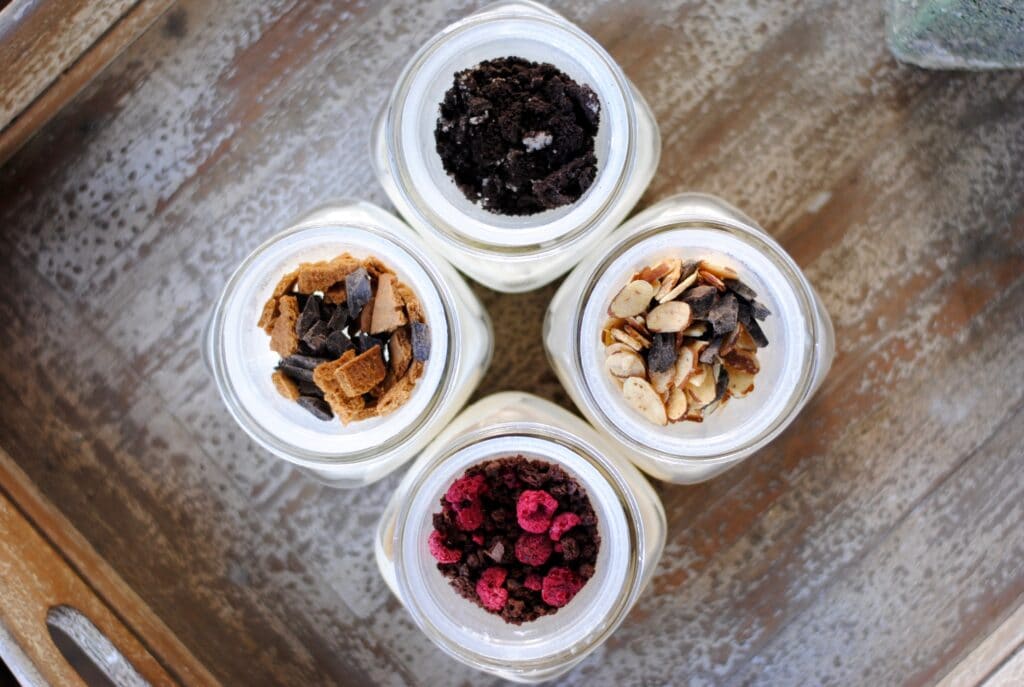
As for toppings needed to make these popular yogurts, I used the following:
- Honey-roasted almonds (I got these from Trader Joe’s)
- Chocolate chunks (these are dairy-free, but I also love these stevia-sweetened chocolate chips)
- Gluten-free chocolate cookies (like Oreos)
- Peppermint extract
- Gluten-free graham crackers
- Dehydrated apples
- Dehydrated raspberries
- Gluten free rice crisps
Traditional Chobani Flip Flavors
There are LOTS of different flavors of yogurts to choose from – some as unique as Buttercrunch Blast and Cinnamon Bun Fun. My 9th grader’s favorite is Chocolate Chip Cookie Dough. My 12 year-old is gluten free, so the only option that’s suitable is Almond Coco Loco. And my son, who’s 9, loves S’mores S’mores. I mean, why not, right?!
DIY Chobani Flip Flavors
These are the versions that we came up with. It’s super fun to try to create your own concoctions. Can we say fun kids activity?!
- Almond Cocoa Loco – our take on their gluten-free option
- Cookies & Cream – ours has gluten-free cookies and paleo chocolate chips
- Mint Chocolate Chip – add some peppermint extract to your yogurt for the base, some GF Oreo-like cookies, chocolate chips and optional rice crisps for a party in your mouth.
- S’mores – because who can say no so s’mores?!
- Apple Crisp Twist – a fun, fruitful flavor
- Coffee Dream – maybe not the most suitable for kids, this one has a caffeine kick!
Almond Cocoa Loco
Ingredients:
- 6-8 oz. Coconut yogurt
- 1 TBSP Honey-roasted almonds
- 1 TBPS Chocolate chunks
Cookies & Cream
Ingredients:
- 6 – 8 oz. Vanilla yogurt
- 1 TBPS Gluten-free cookies similar to Oreos, crushed to small pieces
- 1 TBSP Chocolate chips
Mint Chocolate Chip
Ingredients:
- 6 – 8 oz. Vanilla yogurt
- 1-2 Drops Peppermint extract
- Gluten-free cookies similar to Oreos
- Chocolate chips
- Rice crisps (optional)
S’mores
Ingredients:
- 6-8 oz. Vanilla yogurt
- 1 Heaping TBSP Chocolate chunks
- 1 Heaping TBSP Graham cracker pieces
Apple Crisp Twist
Ingredients:
- 6 – 8 oz. Vanilla yogurt
- Honey-roasted almonds
- Dehydrated apples
- Graham crackers
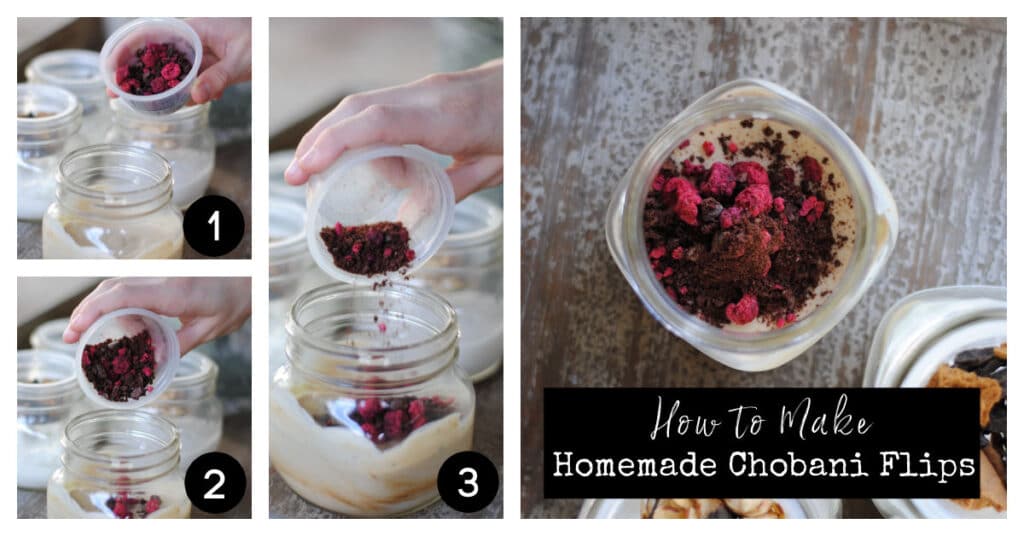
Coffee Dream
Ingredients:
- 6 – 8 oz.Vanilla yogurt with 2 tsp espresso powder
- 1 TBSP Dehydrated raspberries
- 1 TBSP Gluten-free brownie crisps
How to store homemade Chobani Flips
As mentioned above, make these ahead of time and store them in the fridge for up to 4 days. These are perfect for grabbing for a fun breakfast, for sending in your kids lunchbags, or for having on hand for an after school snack. You can even bring them in the car if you are headed straight to activities!
Gluten-free dairy-free Chobani Flip Option:
Make sure to use gluten-free toppings and opt for coconut, almond or oat milk yogurt for the base.
Let me know if you try making your own DIY Chobani Flips and which one is your favorite flavor. Enjoy!


I absolutely love these! They’re great for on the go, or even an after school snack! My kids are always excited to have them, and they’re way more cost friendly than most yogurts.
That is great!! So glad you enjoy!
I am making these this weekend for the week. Thanks for the idea!
Absolutely!! Hoping your kids enjoy them as much as mine do:).