Why I did an elimination diet and how it helped identify my food sensitivities. The four steps to an elimination diet, specific foods to avoid, and tips for having success with this restricted diet.
How to do an elimination diet
I struggled with food intolerances for years. In fact, my story dates back to me being a newborn. I couldn’t tolerate breastmilk. I was breastfed for 3 weeks before my parents switched me to a soy formula. Back then, I don’t know that they looked into the reasoning – they just knew that I needed a different option.
Funny thing is, I never knew this information until I was an adult. Around the age of 9, I began experiencing horrible stomach pains and diarrhea daily. Even at that age, I knew something was off. One day I didn’t buy my normal carton of milk at lunch and I noticed that I had no symptoms. It didn’t take long for me to connect the dots from there; dairy just was not going to be in the cards for me. I shared my findings with my parents who took me to the doctor, and sure enough, I had a lactose intolerance. The doctor told me to look for the “Pareve” label on foods to know that there was no milk included. And that was that! Flash forward to today when there is so much knowledge on food sensitivities and intolerance. I’m a big believer in the elimination diet and think that it can be helpful for so many.
If you’ve ever wondered if you or your loved one has food sensitivities or intolerances, I’m hopeful that this can help get you to a place of understanding and help you remove those foods and feel good. Because you guys – it’s amazing how great you feel when you get rid of foods that can be bothersome!

What are food intolerances or sensitivities?
As described by the American Academy of Allergy, Asthma & Immunology, a food intolerance (sometimes called sensitivity) occurs when a person has difficulty digesting a particular food. This can lead to symptoms such as intestinal gas, abdominal pain or diarrhea. A food intolerance is not the same as a food allergy. An allergy involves the immune system while an intolerance involves the digestive system.
Food allergies can cause serious and sometimes life-threatening reactions even my the tiniest amounts. These can occur on the skin or be gastrointestinal or even respiratory symptoms. An elimination diet involves removing specific foods that may be causing either allergic reactions or signs of intolerance.

What is an elimination diet?
An elimination diet is the act of removing specific foods that may be causing allergic reactions or signs of intolerance.
Elimination diets typically involve removing suspicious foods for a period of time – from two weeks to a few months – and observing how the body reacts. After the elimination phase, foods are reintroduced one at a time to see whether the symptoms resurface, signaling that a specific food is the issue. Keeping a food diary is suggested to record any and all adverse reactions.
While true food allergies can affect the immune system and cause immediate symptoms such as hives, rashes, puffy eyes, vomiting, and even anaphylaxis, many people suffer from food intolerances, and symptoms can be less severe and even show up two or three days after eating the food. Food intolerance symptoms include indigestion, heartburn, nausea, cramps, headaches, and fatigue. Some people even report feeling simply “unwell” and flu-like, and others having issues concentrating.
One of my daughters experienced hyperactivity which was how I first was tuned into her gluten sensitivity. For another one of my girls, it exacerbated her acne and inflamed her skin. By simply removing the gluten, it was obvious what a toll it was taking on her body.

Should I do an elimination diet?
To determine if you should do an elimination diet, first ask yourself these questions:
- Have you experienced digestive symptoms such as diarrhea, bloating, gas, constipation or nausea?
- Do you have joint pain, trouble sleeping or changes in breathing?
- Rashes or other skin issues can also be a sign. Do you experience these?
- How about headaches?
- Do you feel like you have brain fog?
If you answered yes to any of the above questions, you may benefit from doing an elimination diet. During this time, you will remove foods that can be considered problematic. You will see how your body reacts – do you still have those symptoms? Have they improved?
Once determining how you are feeling, you’ll add back one group of food at a time and see how you feel over the course of a few days. It’s important to note that sometimes symptoms don’t show up for a few days, so you want to be sensitive to adding in too many foods at one time.
How to do an elimination diet.
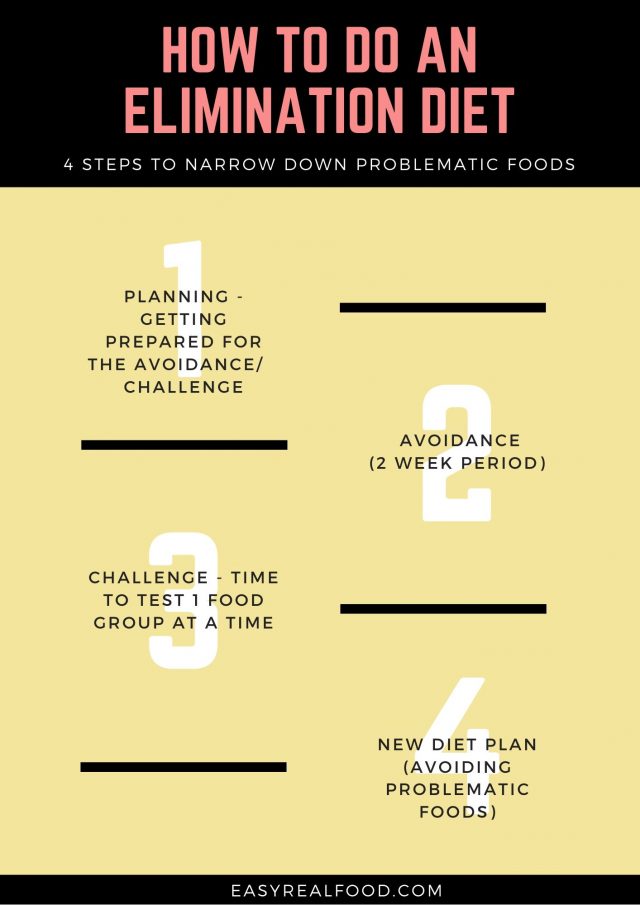
There are four steps to an elimination diet:
1. Planning – during this time, you’ll plan for the 2 week avoidance period. I generally recommend working with a healthcare professional or an Integrative Health Coach (like me!) to do this. It’s helpful to keep a food diary for a week or so prior to planning so that you have some clear answers in front of you, but you should ask yourself: what foods do I typically eat? Which foods do I crave? Are there any foods that you eat to “feel better”?
The next step is determining which foods you’ll be including and avoiding (see below for groups/suggestions). I highly suggest having a meal plan made with recipes that avoid potential trigger foods. Grocery shopping and prepping ahead of time can help with getting you prepared, too.
2. Avoidance – for two weeks, you’ll follow the avoidance list with no exceptions. This takes a lot of discipline, and preparation. If you eat out, this is going to be more difficult than eating in since you don’t know what’s in the foods – so if possible, plan to eat at home and cook there as much as you can. Make sure that you read every label and look for hidden ingredients, and be advised that sometimes people start to feel symptoms worsening during this avoidance phase. They get worse sometimes before they get better.
3. Challenge – now for the interesting part! IF your symptoms have improved, you’ll add back one food group that you took out at a time – example: wheat/gluten. You’ll wait three days to add another food group, and you’ll record daily how you are feeling and if you are experiencing any symptoms. It’s important to start off small with your quantities on the first day and if you do okay, you can add back a bit more on the second day. A personal story: when I did the low FODMAP diet, I tried adding back just 1 tsp of yogurt and my stomach blew up. I confirmed that, yep, I am still 100% lactose intolerant. If the food group does not cause any symptoms, then it likely isn’t an issue for you. This said, you should not add back the food group until you are done doing the challenge.
4. New Diet – take your results and create a new diet. Note that this is not always perfect, and remember I still recommend working with a professional for this!
What can’t you eat on an elimination diet?
Remember – this is only temporary! I say this first because the best elimination diets restrict a good amount of foods. This is only for a short time! Below are suggestions on food/food groups to remove:
Dairy products – This includes milk, yogurt, ice cream, cheese, etc.
Gluten-related foods – Wheat, barley, corn, spelt, rye, oats should be off-limits.
Nightshade vegetables – Potatoes, tomatoes, peppers and eggplants are all common nightshade vegetables. Many people find that these can cause GI issues and thus they should be avoided in doing an elimination diet.
Nuts and seeds – When adding back in, first add seeds in. Wait a few days to see if you have issues before adding nuts back. Note that sometimes specific nuts (ie peanuts) can cause a reaction while others don’t.
Legumes – Eliminate all legumes including beans, lentils, peas and soy products.
Meat & fish – Processed meats, shellfish, eggs should be avoided. To really see what’s affecting you, beef, chicken and pork should also be removed.
Fats – Refined/hydrogenated oils, butter, margarine, mayonnaise.
Beverages – Alcohol, black tea, coffee, other sources of caffeine including soda (plus caffeinated versions)
Tips for doing an elimination diet
- Your elimination diet should last for 2 weeks to a couple months. It is not necessary to do it for longer once you have determined if you have any problematic foods.
- Keep a food journal so that you can note down which foods have been causing issues.
- Look for symptoms like indigestion, heartburn, nausea, cramps, headaches, and fatigue, among others.
- Don’t get frustrated. Remember that this is not going to last longer than a few months at the most!
- An elimination diet should not take the place of allergy testing. If an allergy is suspected, please see your allergist for a full test.
- Work with a professional during this time if possible.
- Make sure to get adequate nutrition throughout the elimination period and also be sure to drink plenty of water.
At home food sensitivity tests
There are a number of food sensitivity tests that you can do at home. I still believe that doing an elimination diet is the gold standard and always recommend this – but for those who wish to do a test, here are some of the popular options:
Everlywell Food Sensitivity Test – measures IgG antibodies in a small blood sample to tell you how your immune system reacts to 96 different foods.
5 Strands Food Intolerance Test – a hair analysis test that measures food and environmental substances that cause non-IgE mediated reactions, known as intolerances. The 5Strands Test will test the body for 550 Items and make a suggestion on what to remove when doing an elimination diet. To reiterate, I do still suggest doing the above, but this is an interesting test.
Have you tried an elimination diet with success? I’d love to hear about it in the comments below!